 |
| Creating a smoke effect in Photoshop - the final image |
Before adding smoke (Left) and after adding smoke (Right) -
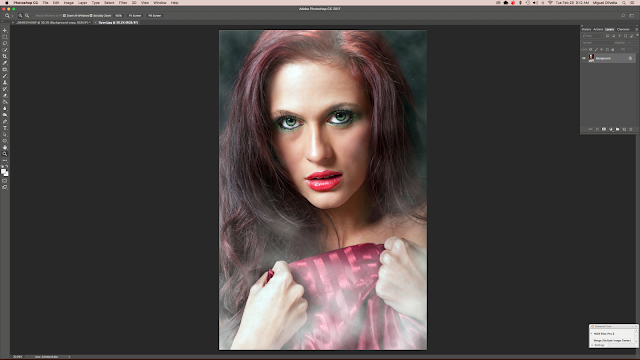
While I'm a big believer in doing as much as I can in-camera as opposed to doing things in post processing, Photoshop can sometimes be just the ticket when you want to add a smokey mood to an image without the challenges of using a fog machine. Here's a step by step process that you can try, and it's not limited to portraits. You can use it on landscapes or anything else that tickles your fancy.
I've opened the RAW image in Photoshop after running it through Camera Raw and made my basic adjustments.
Since it's a portrait/beauty shot, I've touched up the skin and put the image through my usual beauty/portrait corrections. Now, for the smoke.
Step 1 - Create a duplicate layer of the background
Step 2 - Create a New Layer (click on the 2nd from the right icon at the bottom of the Layers box on the right of the screen). A white box will appear above the duplicate layer.
Step 3 - Change the Blending Mode from the default Normal to Soft Light
Step 4 - Click on the Quick Mask tool (2nd tool from the bottom in the Tool Menu at left, or use the shortcut - press the letter "Q")
Step 5 - Go to the Filters drop down menu, move the cursor down to Render, and then click on "Difference Clouds" when that menu opens
Step 6 - Don't freak out when you see your image covered in red blotches. When you remove the Quick Mask (click on the Tool again or press the letter "Q" again) the red blotches go away, replaced by marching ants in the pattern of the now-gone red blotches.
Step 8 - Generally, the "clouds" you have created will have to be made larger depending on the size of the Background Layer. If you want to make the "clouds" larger, make the image smaller in the Photoshop window and use the Edit - Free Transform Tool to enlarge the clouds as I've illustrated in the two images above.
Step 9 - Create a Layer Mask in the Clouds Layer (click on the 3rd icon from the left at the bottom of the right window while in the Layers Window). Using a brush set to a 10%-25% opacity and 0% hardness, selectively brush out those portions of the image in which you don't want there to be "smoke". In this image, I've brushed out the clouds from most of the face, less on the hair.
 |
| The final image |


No comments:
Post a Comment